How to install an SSL certificate with Webmin
On 12/07/2018 By Valentin RicciPre-requisites
You need :
To have already installed OpenSSL.
To have generated a CSR (Certificate Signing Request). It's possible to do this directly on our website.
To have uploaded the private key generated at the previous step on your web server.
Be careful not to loose it.
A root access on the server.
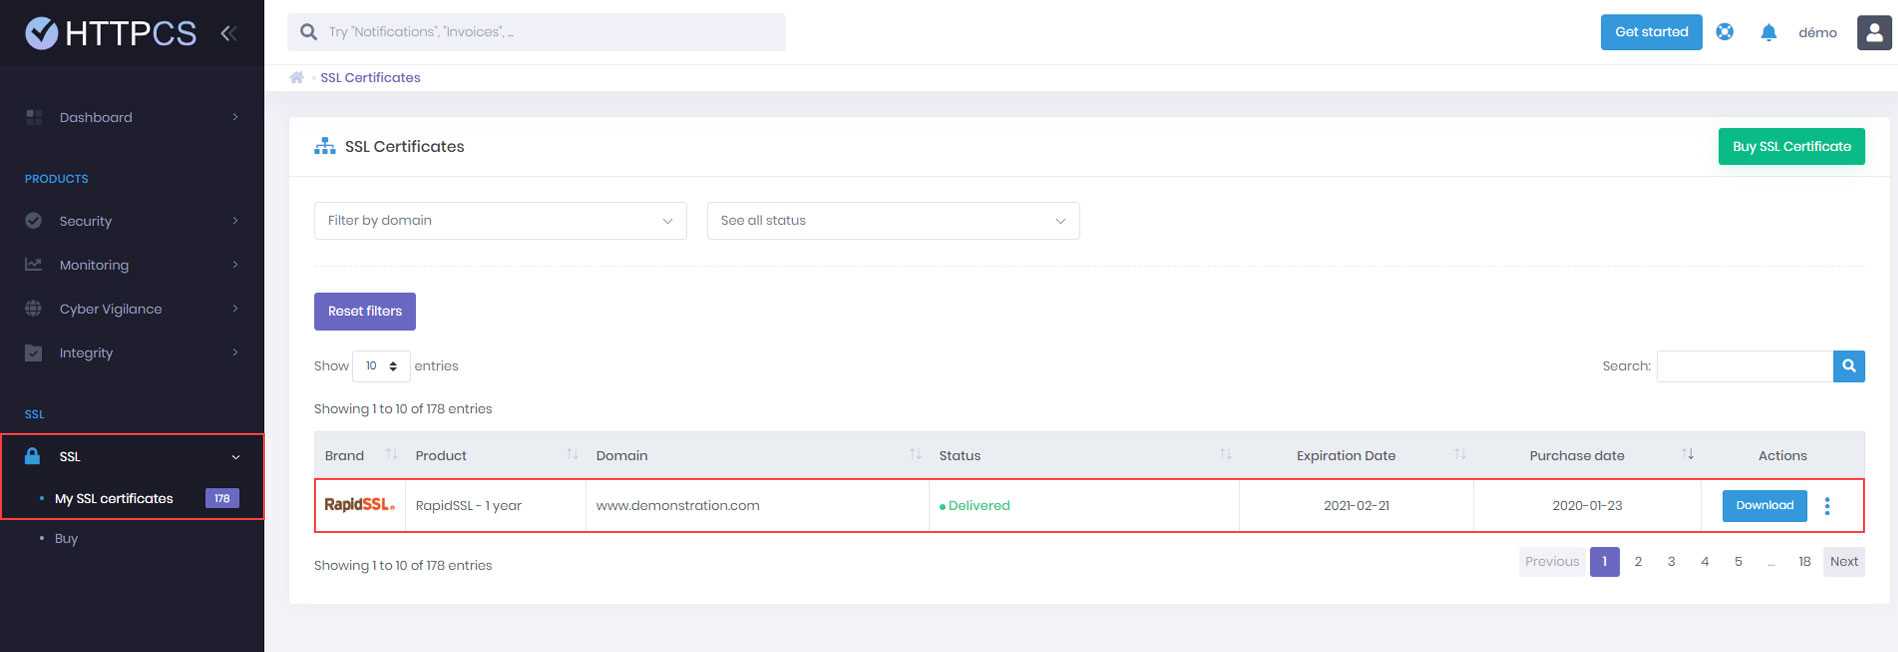
Once the Certification Authority has validated your CSR, log into your HTTPCS dashboard to download your certificates.
Detailed tutorial to install your SSL certificate with Webmin
1. Log into your Webmin interface in a web browser with your root credentials (or any other administrator user).
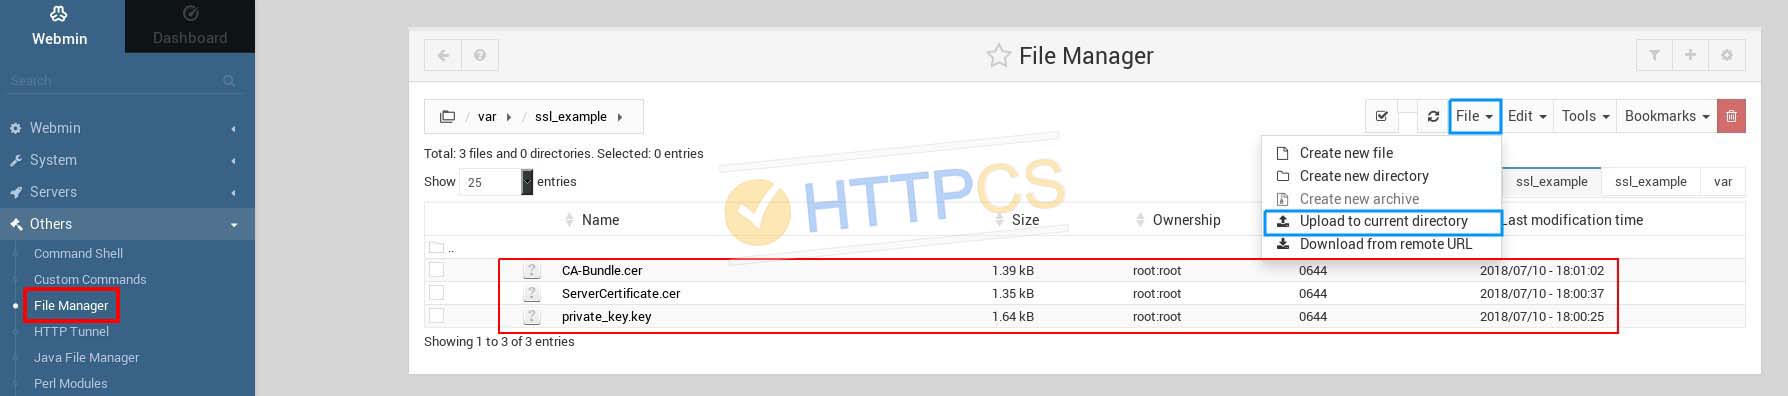
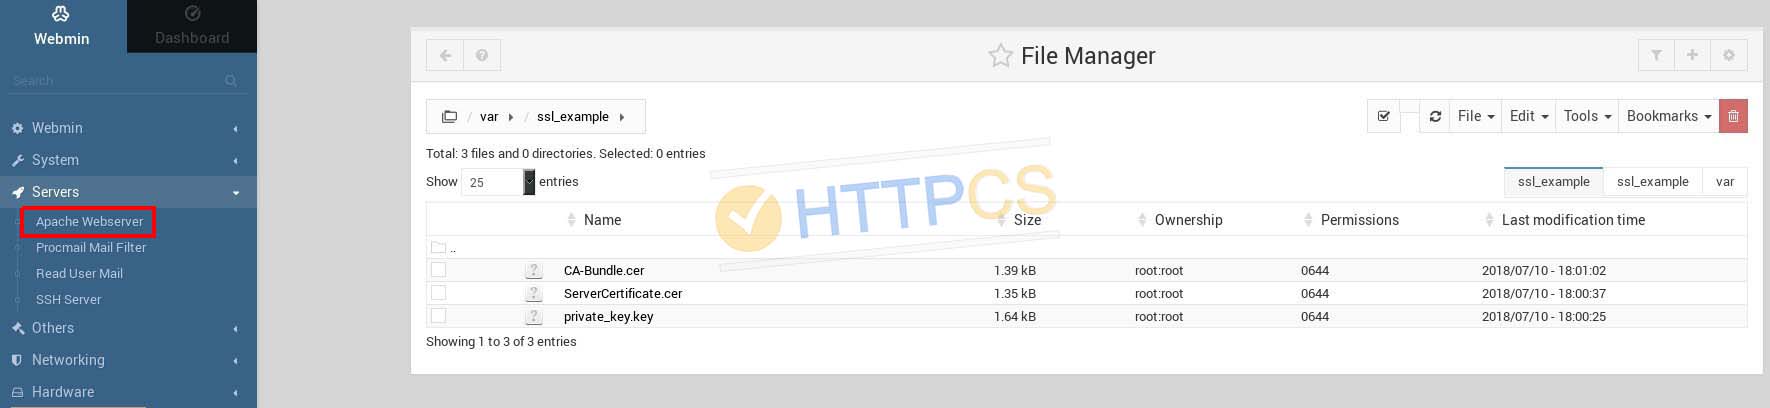
2. In the left panel on the main page, click on Others > File Manager. Navigate to the folder where you've put your private key, then click on File > Upload to current directory in the top right corner. Then upload the certificate (your_domain_name.cer) and the CA Bundle.
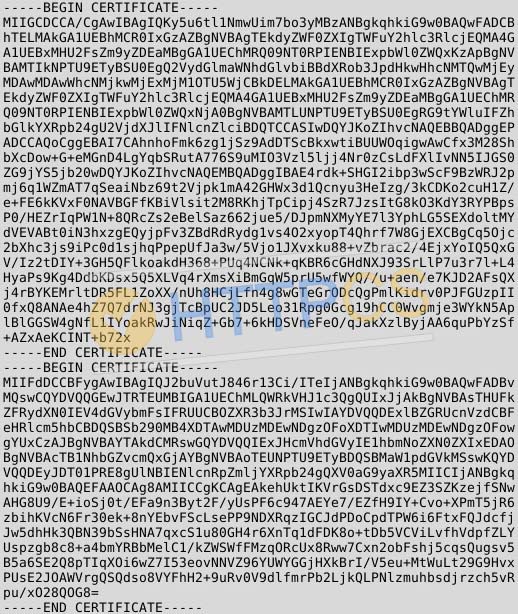
NB : When you've downloaded the certificate from your HTTPCS account, if you've obtained 2 files named « CACertificate-1.cer » and « CACertificate-2.cer », create a new file named « CA-Bundle.cer » and paste the content of « CACertificate-1.cer » in it. Then paste the content of « CACertificate-2.cer » at the end. The final bundle file should look like this:
3. Once the two files are uploaded, click on Apache Webserver in the Server subcategory, in the left panel.
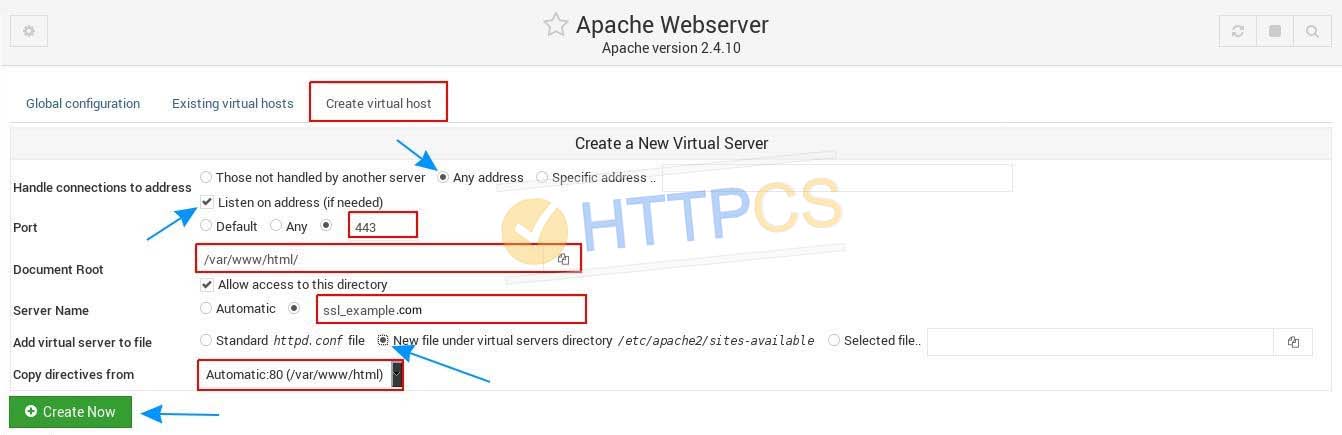
4. Click on Create Virtual Host and select « Any address ».
Choose a listening port (for SSL, default is 443).
In Document Root section, specify the root path of the website you want to secure.
In Server Name section, type your website's domain name.
In Add virtual server to file section, choose « New file under virtual servers directory /etc/apache2/sites-enabled ».
In Copy directive from section, select Automatic in the dropdown menu.
Once these settings are done, click on Create Now.
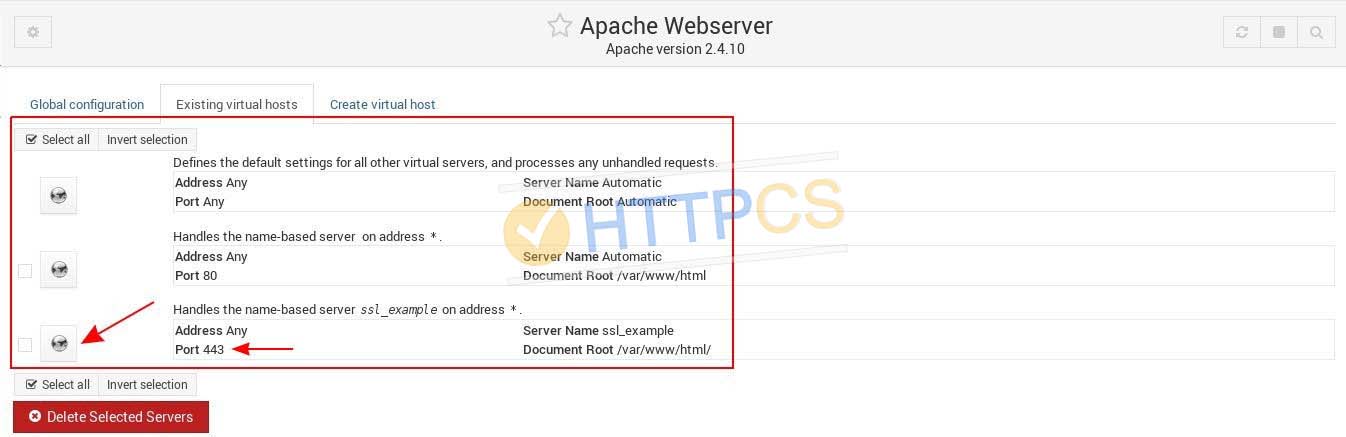
5. If everything went fine, a new virtual host listening on port 443 should appear on Apache Webserver page.
6. Click on the newly created server to open its settings, then click on SSL Options.
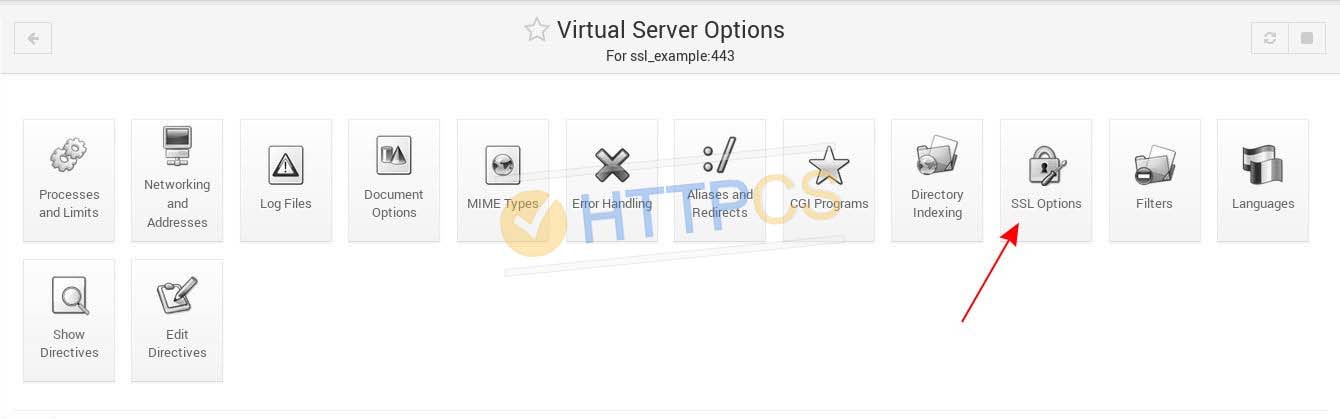
NB: If you cannot find any SSL Options button, you might have to enable SSL module on your server. You can achieve this executing either one of the following commands, depending on the operating system you're using:
a2enmod ssl
or
yum install mod_ssl
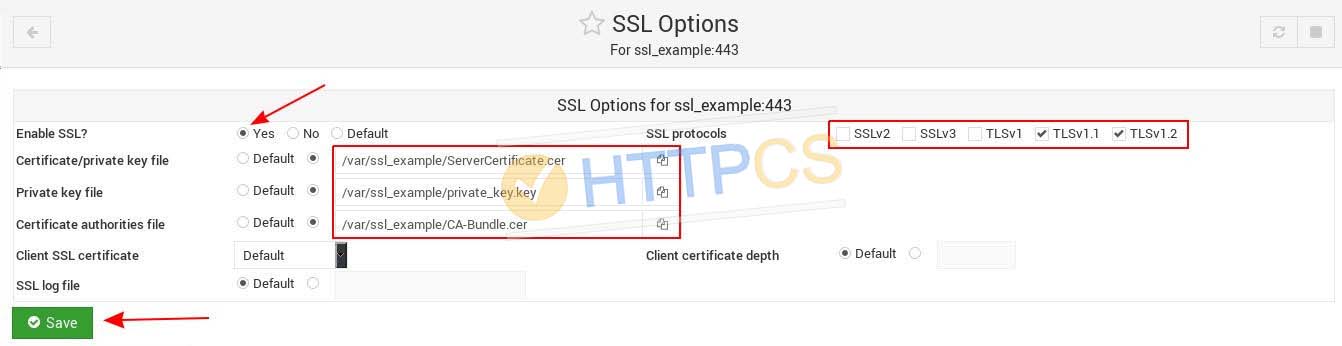
7. Set Enable SSL setting to Yes and disable SSLv2, SSLv3 et TLSv1 which are outdated protocols, nowadays recognized as weak. Then specify the paths to your domain certificate, to your private key and to the CA Bundle files in the corresponding fields. Click on Save.
8. You can now make sure your certificate is correctly installed.
Buy a cheap SSL certificate for Webmin